I’ve had two different bosses in two different industries tell me that “if a task feels tedious then you’re using the wrong tools.”
And that is especially true with auditing, editing, and implementing website changes.
Here’s an all too common scenario – you’re a marketer or website owner in charge of a large-ish website running WordPress.
Unlike website software in the past, you can make content changes to your website. In fact, you’ve chosen WordPress over hosted website builders so that you can make these bulk changes.
But whether you are trying to make WordPress bulk edits to post content, titles, or any part of your taxonomy…
It is still all too tedious.
If you have no developer resources and no MySQL skills, the best option you have is to open a bunch of pages in new tabs. Sometimes a plugin like Yoast SEO will include “bulk edit” options, but even then, it’s not very fast.
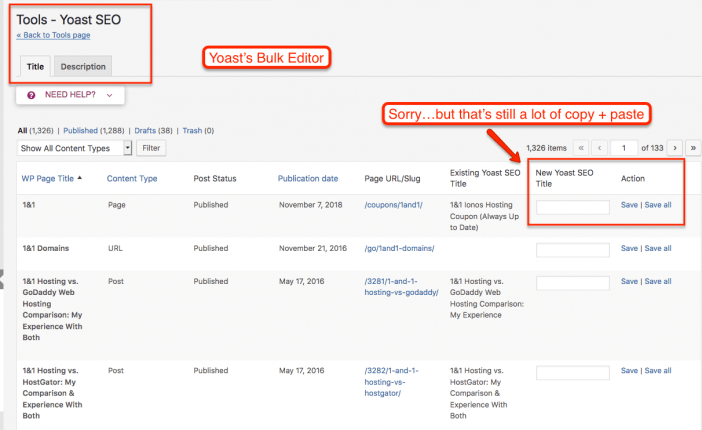
When I say “bulk edits” – I mean taking spreadsheet data, uploading it, and editing dozens to thousands of pages at once.
And that is what this tutorial is all about. Here’s a few common scenarios where you can use this technique –
- Bulk title tag changes
- Bulk meta descriptions changes
- Changing post headlines
- Editing content text to reflect a rebrand
- Bulk adding a bunch of pages (ie, city pages for a local website)
- Editing product content
- Editing tags and category data
Basically, anything else limited to your imagination where you’d otherwise need to open pages in WordPress and manually edit.
A Better Way

Larry's Take
| Platform | WordPress |
|---|---|
| Price | FREE - $249/year |
I interrupt this how-to to discuss a better way to edit WordPress content in bulk.
Instead of manually editing information in WordPress that can be prone to errors, Admin Columns Pro is truly a lifesaver. I use Admin Columns Pro on all my WordPress blogs, and something I recommend you get yourself.
What You’ll Need
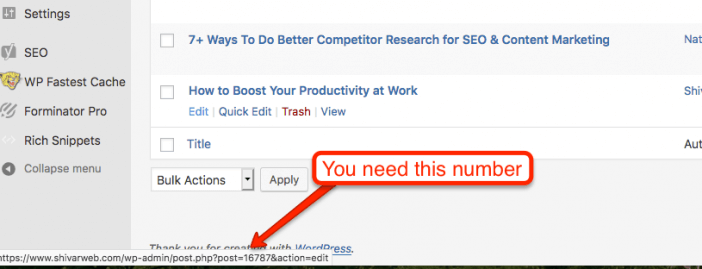
A general understanding of post_id in WordPress.
The post_id field in WordPress is literally the ID number of every post/page you have in your WordPress database. Even though everything about a given post/page might change, the post_id always stays the same. If you are adding pages/posts in bulk, you’ll need to create these and make sure they are different than the ones you already have.
Post_ID’s are usually seen in Admin panel links –
Access to phpMyAdmin. phpMyAdmin is located in your hosting account. It allows direct access to your WordPress database.
Your spreadsheet software of choice AND LibreOffice. Excel and Google Sheets are great, but you’ll need to format your CSV file in a certain way for upload. Grab a copy of LibreOffice to make this simple.
The Really Simple CSV plugin. This plugin will allow you to upload your CSV file within WordPress and will match up & override database fields with your edits. Grab it here (it hasn’t been updated in while, but I’ve found it safe to use even in 2020). There are premium options like WP All Import, but this free plugin even worked for my most recent 1200 page project.
A backup of your WordPress database. Please, please do not attempt this without a backup of your WordPress database. If something goes wrong, you’ll need to import your old database back in via phpMyAdmin.
Step 1. Get your current content in spreadsheet form
To start, you need to get all page data from WordPress. You’ll have to get it directly from the database since post_id usually is not public or crawlable.
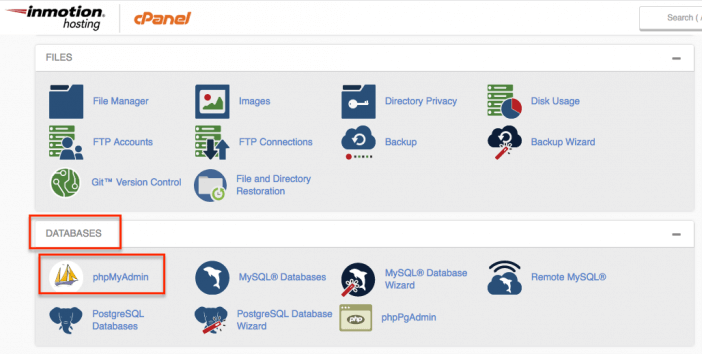
These steps may seem technical, but you’ll be fine, especially if you are using web hosting like shared or VPS that comes with common account management software like cPanel. Head over to your hosting company (these screenshots will be from InMotion Hosting), and look for cPanel.
Load up cPanel and scroll.
Go to phpMyAdmin.
Locate your database. Your database will have a bunch of tables like posts, users, etc.
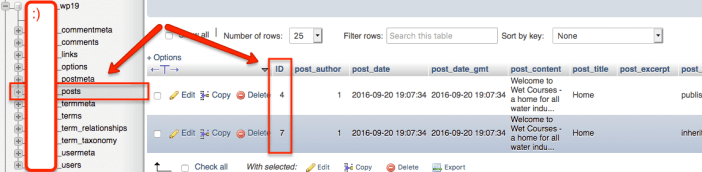
Locate your WP_Posts for changes to content like I’ve highlighted in the screenshot above.
- If you want to edit categories or tags, look at the terms and taxonomy tags.
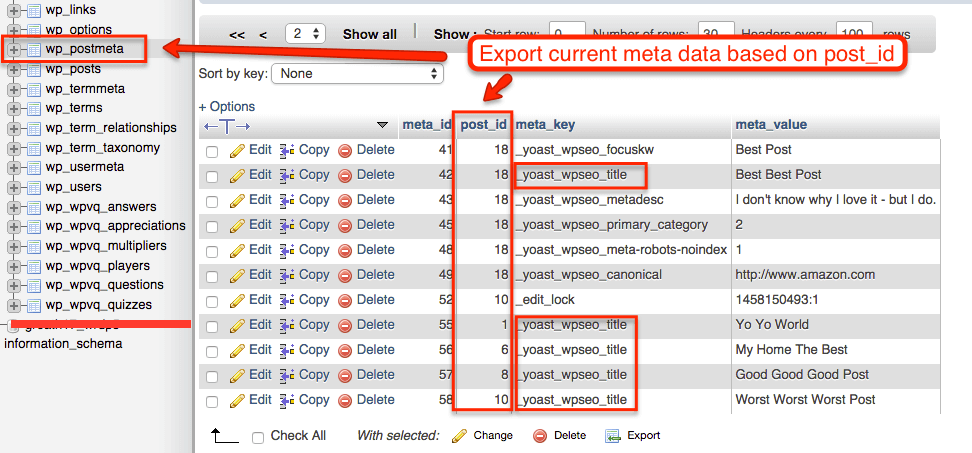
- If you want to edit content meta (like Yoast SEO changes) – also locate the _PostMeta table.
- If you want to bulk edit content from other plugins like WooCommerce, BuddyPress, etc, look for their relevant database tables.
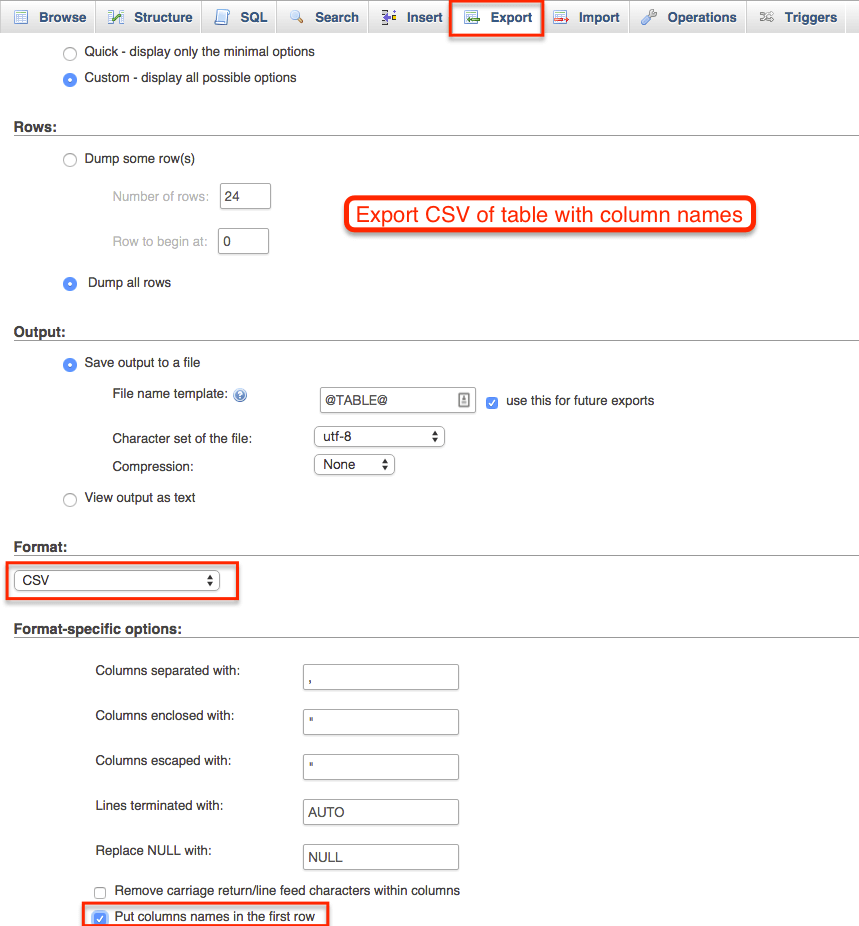
Export the table to CSV with column names.
Step 2. Clean Up Your CSV
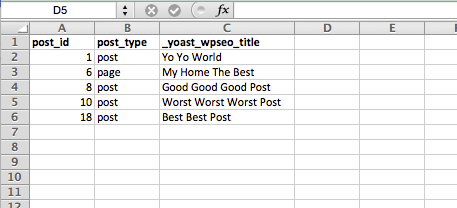
You’ll notice that your CSV file is a bit cluttered. You’ll need to use your spreadsheet software of choice to delete and clean-up the sheet.
The key is to leave the Post_ID column in place, plus a column that will help you recognize what post is what (ie, post title) and the post_type field to distinguish between posts, pages, and any other content types you have.
If you also downloaded another table, such as the _PostMeta table, you can use the PostID to match up the SEO Titles via VLOOKUP.
If you want to add new content, then go ahead and assign a Post_ID that does not already exist.
If the column that you want to edit is already there, then leave it and skip to the next step. If it’s not, you’ll need to add a new column header. Here are the default database headers that you can add –
- post_author: (login or ID) The user name or user ID number of the author.
- post_date: (string) The time of publish date.
- post_content: (string) The full text of the post.
- post_title: (string) The title of the post.
- post_excerpt: (string) For all your post excerpt needs.
- post_status: (‘draft’ or ‘publish’ or ‘pending’ or ‘future’ or ‘private’ or custom registered status) The status of the post. ‘draft’ is default.
- post_password: (string) The password to protect the post. The password is limited to 20 characters.
- post_name: (string) The slug of the post.
- post_parent: (int) The post parent id. Used for page or hierarchical post type.
- menu_order: (int)
- post_type: (‘post’ or ‘page’ or any other post type name) (required) The post type slug, not labels.
- post_thumbnail: (string) The uri or path of the post thumbnail. E.g. http://example.com/example.jpg or /path/to/example.jpg
- post_category: (string, comma separated) slug of post categories
- post_tags: (string, comma separated) name of post tags
- tax_{taxonomy}: (string, comma separated) Any field prefixed with tax_ will be used as a custom taxonomy. Taxonomy must already exist. Entries are names or slugs of terms.
- comment_status: (‘closed’ or ‘open’) Default is the option ‘default_comment_status’, or ‘closed’.
Note: Empty cells in the csv file means “keep it”, not “delete it”.
Note: To set the page template of a page, use custom field key of _wp_page_template.
If you are an SEO using Yoast SEO for WordPress – here’s the database headers you can work with –
- _yoast_wpseo_focuskw – use to define your target/focus keyword in Yoast.
- _yoast_wpseo_title – use to define your title tag for that page.
- _yoast_wpseo_metadesc – use to define your meta description on that page.
- _yoast_wpseo_primary_category – use to define your primary category for breadcrumbs.
- _yoast_wpseo_canonical – use to define your canonical.
- _yoastwpseo_meta-robots-noindex – use to define if it’s a NOINDEX page (1 is yes value)
- _yoastwpseo_meta-robots-nofollow – use to define if it’s a NOFOLLOW page (1 is yes value)
And if you are using RankMath instead of Yoast – here are the main ones.
- rank_math_title
- rank_math_description
- rank_math_focus_keyword
To find other fields for other plugins, navigate through your database to find the field you’re looking for. Note the value to figure what the right value looks like.

You can also download the Really Simple CSV sample CSV.
Step 3. Make Your Changes & Format Correctly
An Excel / Google Sheets tutorial is out of the scope of this post. But at this point, you’ll need to get the changes you want in all the right rows / columns.
Then, save the file as a CSV.
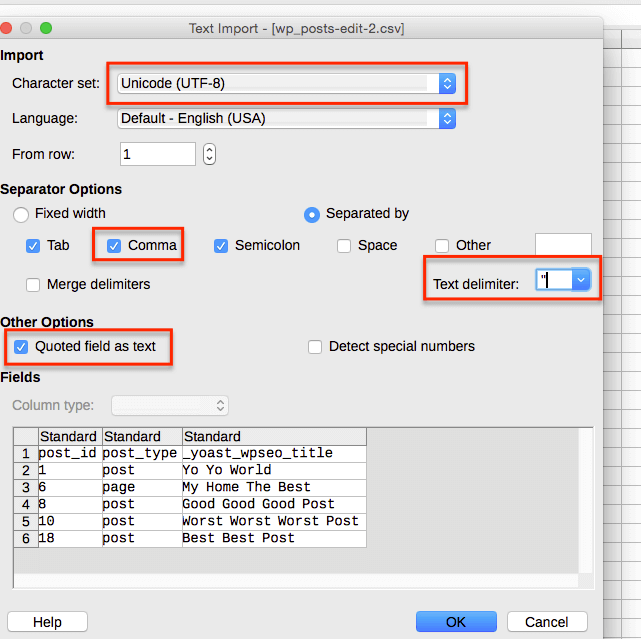
Next, open up the file with LibreOffice. Then, re-save as a CSV with the following conditions –
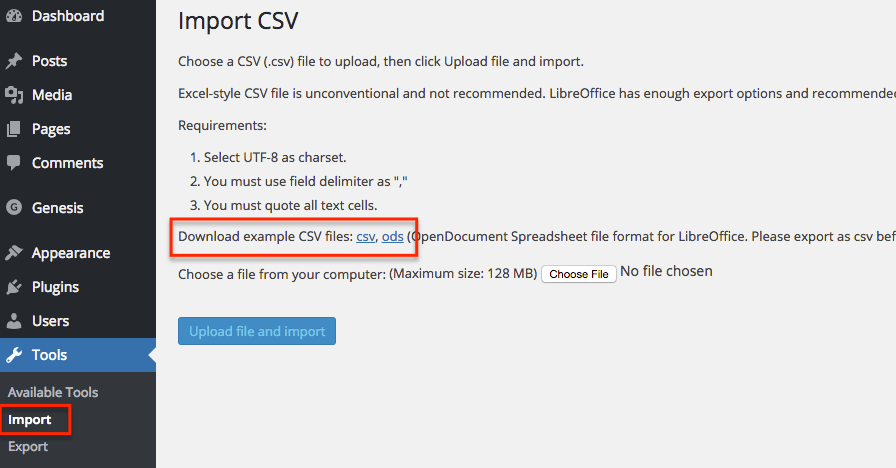
1. Select UTF-8 as charset.
2. You must use field delimiter as “,”
3. You must quote all text cells.
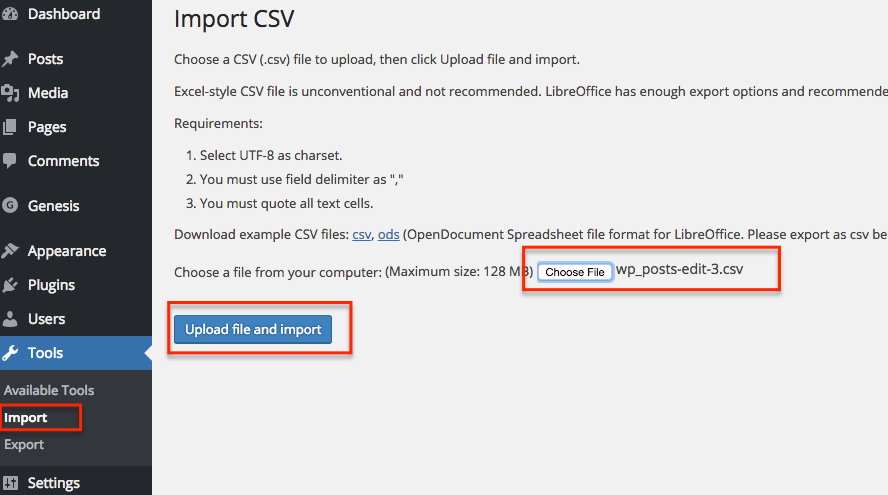
Step 4. Upload via Really Simple CSV
Install Really Simple CSV if you have not already.
Go to your WordPress Dashboard → Tools → Import → CSV
Upload your CSV file.
Then audit a sampling of your pages or use a crawler like Screaming Frog to quickly look at all your pages.
Enjoy the feeling of incredible productivity.
Video Walkthrough
Next Steps
Decide if you need to make bulk changes to WordPress. Scroll back up to the What You’ll Need and get everything in order.
Note for marketers with larger websites – it’s usually not ideal to do a “hot fix” on a production (ie, live site). Ask your developer if you have a staging site that you can upload and test changes before “pushing” the changes live. Or use a WordPress Hosting plan that has staging sites built in.
Otherwise, you may want to create a local or demo site to test this out before making hundreds of database edits to your live site.
Last note – if you are on a shared server, be careful about uploading too many changes at once. At best, your upload will timeout. At worst, you’ll crash your server like I did trying to edit 10,000 pages at once. Check your server limits and consider breaking your CSV into smaller chunks.
Found this post useful? Link to it on your resources or roundup page or share it with the share buttons!