This guide covers exactly how to create a website like Facebook (or any social network) using WordPress and the BuddyPress plugin.
WordPress + BuddyPress allow you to build a beautiful website with key social networking features such as user profiles, groups, mentions, activity feeds and more.
You’ll be able to build your site “out of the box” step by step with a couple bits of free, open-source, quality software that’s meant to empower anyone to start a social network for their meetup, school, community, hobby – anything you can imagine (without hiring $$$ developers to write all the code from scratch).
WordPress started more than a decade ago as simple blogging software, but it has grown and evolved into the most widely used “content management systems” (aka CMS) on the Internet. It gives you the tools to build & manage any type of website from scratch.
WordPress has “Plugins” or bits of software that adds features & functionality…such as social networking features.
In other words, WordPress provides the foundation of a website that’s adaptable to build any type of website. It’s going to allow you to build a website like Facebook with no real programming knowledge by just installing bits of software that work together.
Capabilities & Expectations
Before we get started, there are a couple of things to clarify. First (and most obvious) is that there are a million different ways to build a social network website like Facebook – just like there are a million ways to build a house. It comes down to the key features that you want, and what it takes to get them.
I’m a fan of WordPress + BuddyPress because:
- It works out of the box
- It’s supported by a very active community
- It has all the key features of a social network
- It has options & a community of developers who can easily add anything on top of the platform
- It’s open-source, free & standardized so you are not “locked in” if you ever need to develop a custom solution
However, it’s also not:
- Supported by billions of dollars of investment (aka Facebook)
- Specifically built from the ground up with social network features
- Drag, drop, click & done.
It requires a bit of thought, setup, and planning. But that is what this guide is for! Let’s dive into how to create a website like Facebook with WordPress.
Getting Started – Hosting & Installing WordPress
Your absolute first step will be getting a domain name (an address for your site) and a hosting account (a server where your website will live) with WordPress installed on that server. If you want exact details & screenshots on this process –> pause and read & follow my guide to setting up WordPress from scratch here.
Your choice of domain name provider doesn’t matter directly as much as hosting. I like to keep domain & hosting separate if only for costs & flexibility. As mentioned in the setup guide, I’m a fan of Namecheap for a clean dashboard and better long-term pricing (see their plans here). I wrote a long review of Namecheap and GoDaddy here.
Social networking sites are going usually start off small resource-wise, but can quickly grow to have a large database with heavy PHP memory and storage requirements.
To start off, a well-provided for shared linux-based hosting account will do fine for a while. The ones I recommend in the setup guide are all solid because they all provide more then 256M of memory (something not featured by many hosting companies) and provide unlimited storage. In the setup guide, I recommend the following hosting plans to start off a WordPress + BuddyPress site:
- HostGator (see their plans w/ 45% off here). Great host overall when factoring in great pricing, solid service & complete features. I use them for most of my personal projects, including this website.
- InMotion Hosting (see their plans w/ 53% off here). A strong, independent hosting company. A bit more expensive than HostGator but with impeccable service in my experience.
If you are planning on starting out with hundreds of active users, you will want to start out with a service that either has dedicated server resources OR a staff that actively manages your WordPress installation and server resources for you.
That will mean purchasing a Virtual Private Server (VPS) through InMotion (actually the exact plan ShivarWeb.com uses), which will give you lots of dedicated server resources for a large site. If purchased with cPanel, it will be a similar setup process as with shared hosting.
Or it will mean getting a plan with someone like WP Engine (also a company I have used for some projects) which focuses specifically on WordPress hosting and actively manages your installation & server resources for you (see their plans)
All companies mentioned have a straightforward quick-install WordPress process (again, detailed in my setup guide here).
Once you’ve got WordPress installed and you are familiar with the WordPress Dashboard and backend setup, it’s time to create a website like Facebook (or any social network).
Introduction to BuddyPress
As I mentioned earlier, WordPress is the content management system that “powers” your website. What makes it so versatile though is that you can install plugins for WordPress to add additional functionality that isn’t included in the main package.
BuddyPress is one such plugin. It’s a plugin that adds user profiles, activity streams, user groups, and other social network type functionality to your WordPress-powered website. Unlike many plugins that are developed by third parties, BuddyPress is actually one of the plugins developed directly within the WordPress community.
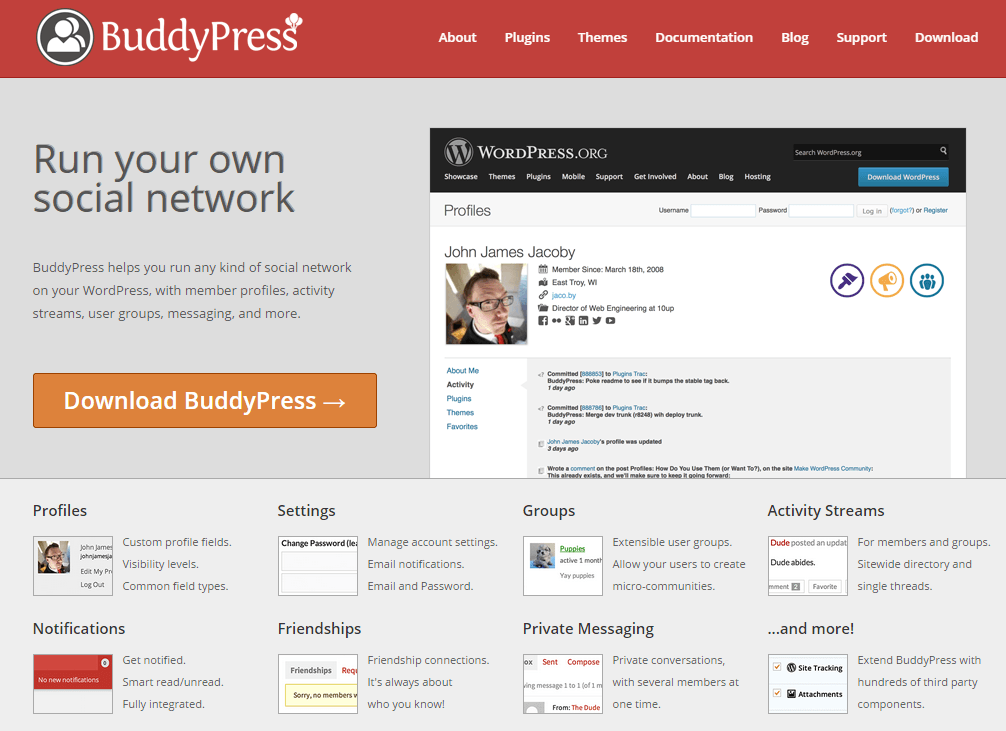
It’s built to work hand in glove with WordPress and it has the same type of documentation. It’s also operated under the same principles as WordPress.org software – it’s open-source (aka not proprietary to a corporation); it’s GPL licensed (aka you can use it and modify it as you wish); and it’s free and supported by the community and users around it.
Because it’s open-source, any site you build with BuddyPress + WordPress will be yours. There’s a lot of plug-and-play social network platforms, but if you develop a site with their software, it will not be truly yours.
Since it’s part of the growing WordPress ecosystem, it has a strong community of developers (they actually just raised $51,000 to let a developer focus solely on speed optimizations for BuddyPress). And since there’s so much interest in BuddyPress, it’s easier to find developers who can work with WordPress/BuddyPress platforms.
Now that you know a bit about what you’re working with, let’s actually get it installed.
Install the BuddyPress Plugin
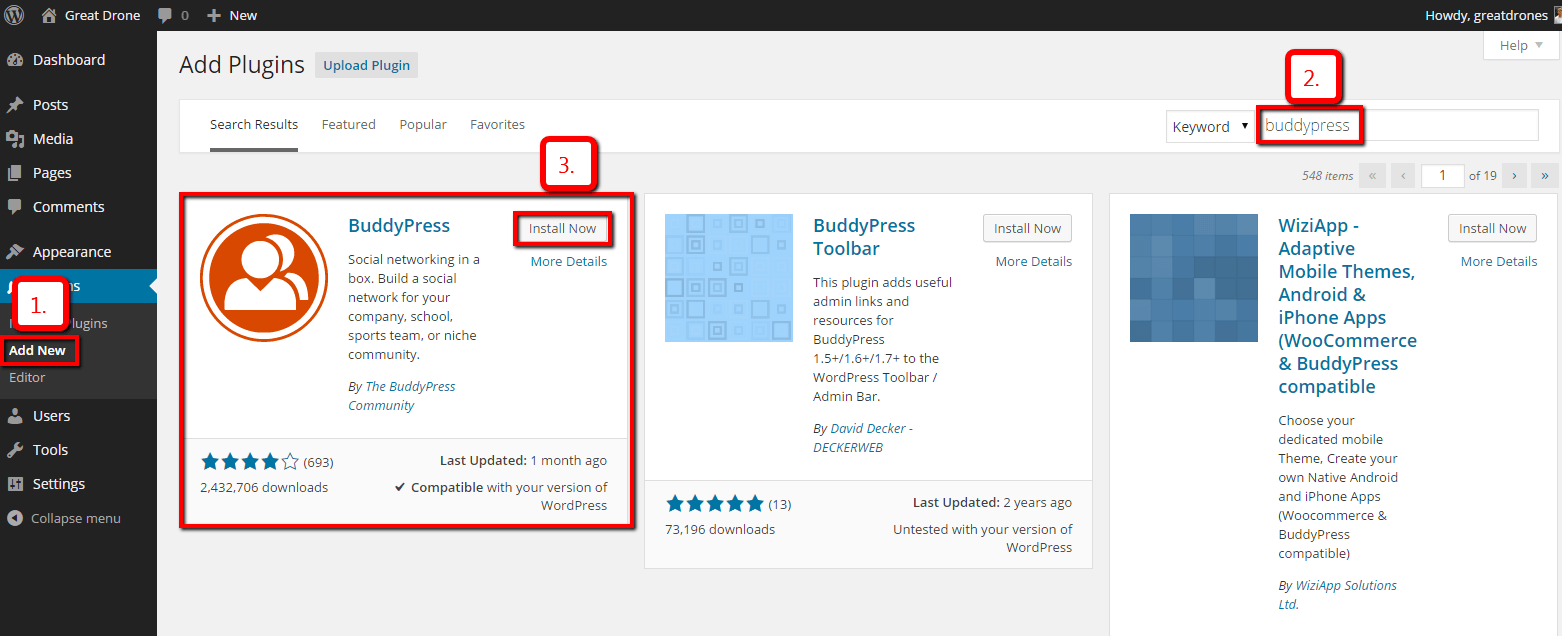
To install the BuddyPress plugin, navigate to Plugins –> Add New from the WordPress Dashboard. Then search for BuddyPress. Click install, then click Activate.
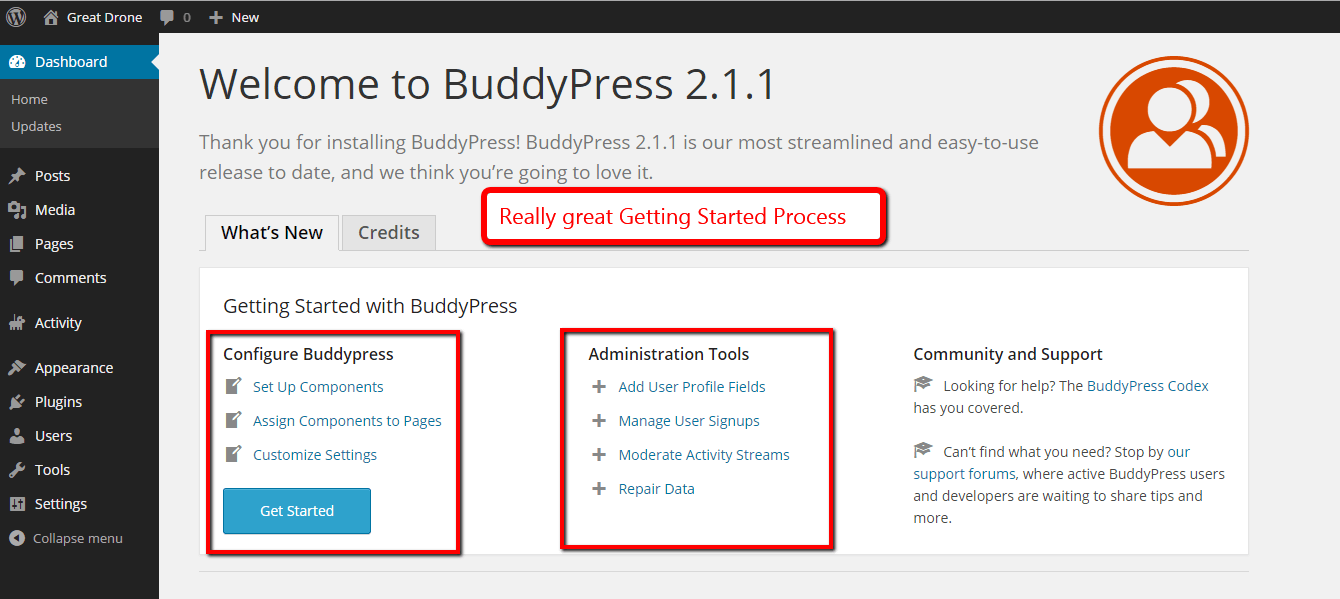
After activating the plugin, you’ll be redirected to the BuddyPress welcome screen with next steps.
Now before you dive in setting up different components and features, it’s a good time to stop and envision the functionality of your site without the design.
What exactly do you want your members to be able to do? It’s one thing to “be like Facebook” or “be like Twitter” but in reality, their core features have been around since the dawn of the web – peer-to-peer communication, organization into groups, links, profiles, etc.
Configure Your Social Network Features
Now that you have an idea of exactly what you want to achieve, let’s go ahead and start configuring the functionality of BuddyPress to fit what you’re looking for.
Head to Settings –> BuddyPress and check out the default Components tab.
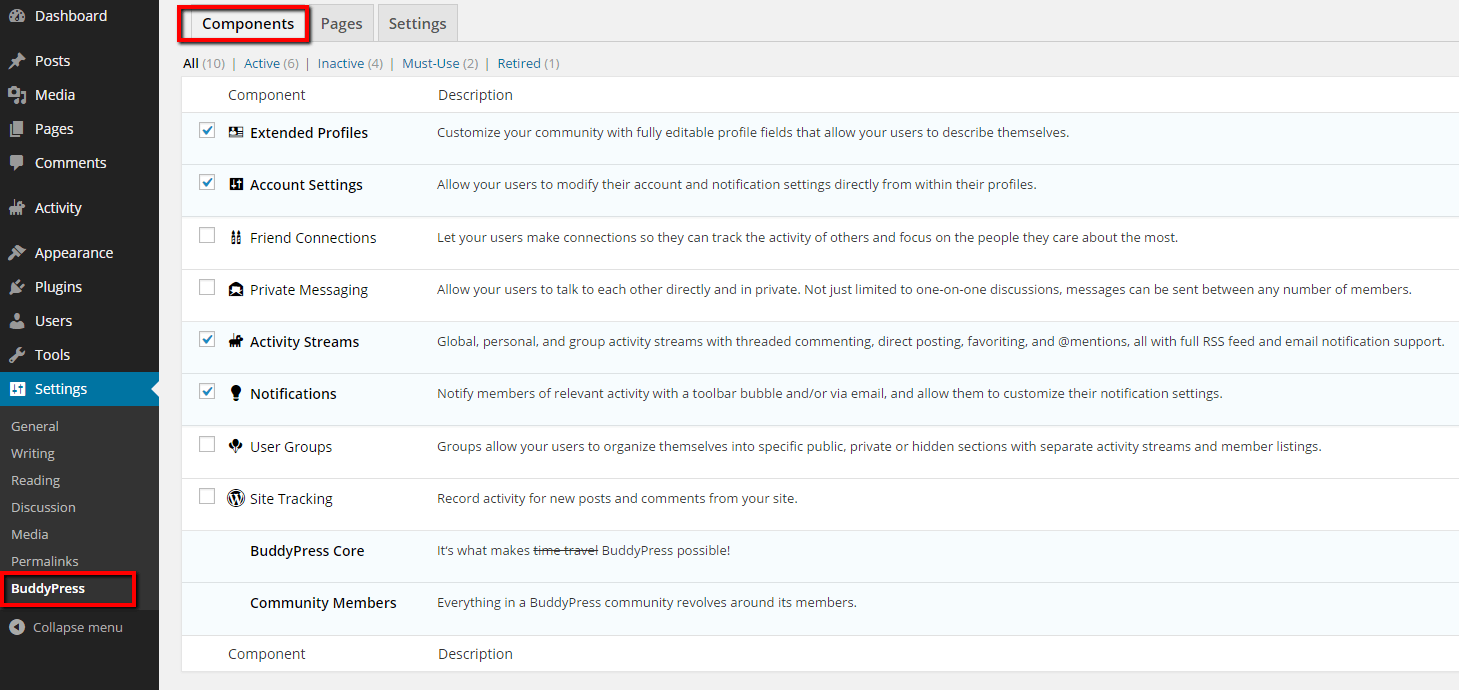
You’ll get to decide on:
Extended Profiles
Even without BuddyPress installed, WordPress allows people to register as users. BuddyPress lets you enable this option to expand the user profiles, so they can make it into a true Facebook/Twitter/Google+ style profile page.
Member Account Settings
Allows users to customize their settings without contacting the owner of the social network (ie, you).
Friend Connections
This is exactly like the Facebook friending or Google+ Circling functionality. Your users customize who they keep up with in their feeds.
Internal Messaging
Think Facebook/Twitter mentions and/or direct messages. Allows users to message each other directly within your network.
Notifications
Enables notification functionality both within the site with a user toolbar and with email. Users can customize their alert options.
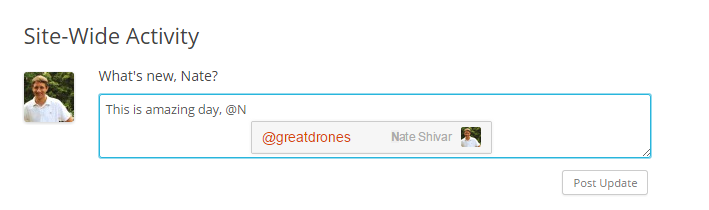
Activity Streams
This component generates customized streams (aka the Facebook Newsfeed or Twitter feed). It’s fully customizable and comes with RSS/Email support if you want it.
User Groups
If you want something like Facebook Groups, then here’s your component. This allows your users to organize public, private or hidden activity groups to talk about whatever they want to discuss.
Site Tracking
If you want BuddyPress to organize site usage statistics – then there you go.
That’s all of BuddyPress’ built-in functions. However, the huge advantage of BuddyPress is the fact that it’s an open-source platform, so anyone can build a plugin to extend it even further (and yes, that does mean there are plugins for plugins – so awesome). We’ll cover additional ways you can extend functionality in a separate section.
But first, let’s finish setting up internal settings & fields.
Configure Your Settings & Fields
The next tab in BuddyPress settings is the Pages tab.
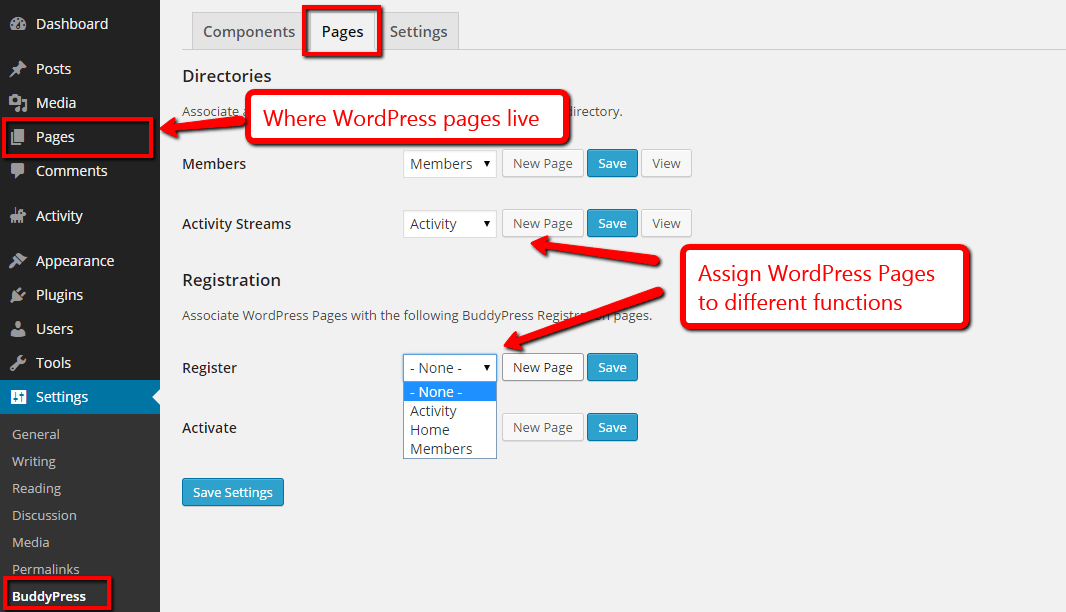
BuddyPress has several required pages – such as member page and activity page. It will automatically generate them.
If you want a specific sign-up & activate membership page (ie, if users can sign up without you assigning username/password), then you’ll need to create a Page and then “assign” it to these roles respectively.
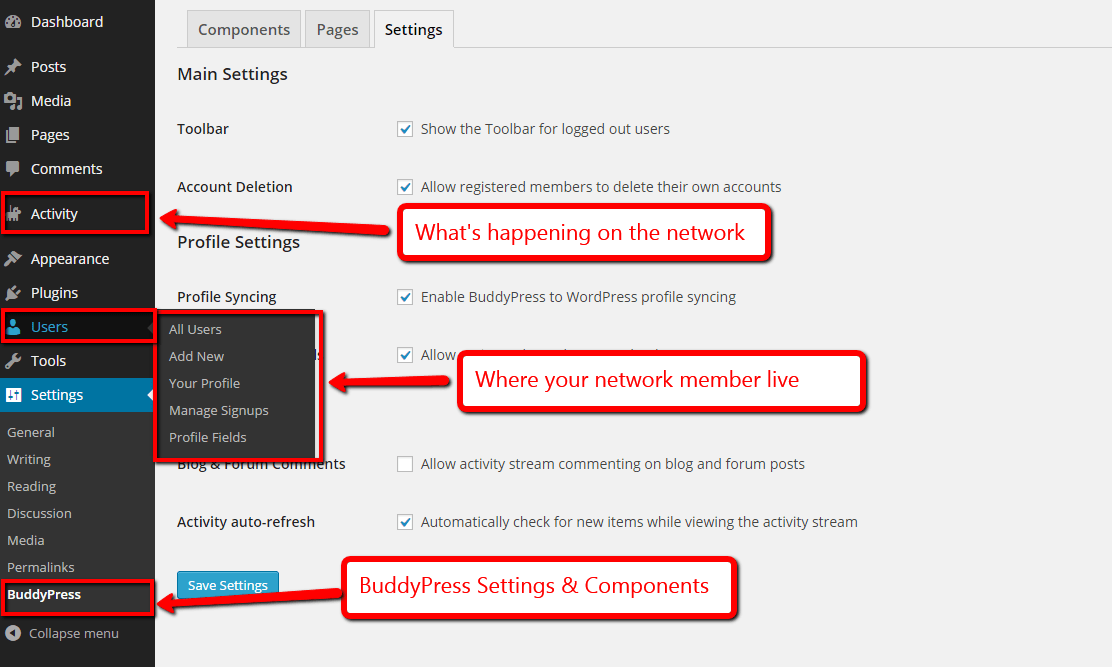
The next tab is actual Settings. These are fairly self-explanatory with the defaults being the norm.
For an overview of where everything relate to BuddyPress is from the WordPress Dashboard:
Now you have a fully functional social network site just like Facebook, Twitter or Google+. However, as you can tell, functionality is only part of the battle. The real wins are going to be with design. So let’s dive into that next.
Get a BuddyPress Compatible Theme for Design
In WordPress, plugins handle functionality and themes handle the design & layout of the website.
Since BuddyPress is a WordPress sub-project, it integrates quite well with all default WordPress themes. It uses similar classes and templates, and will keep your design across all page types.
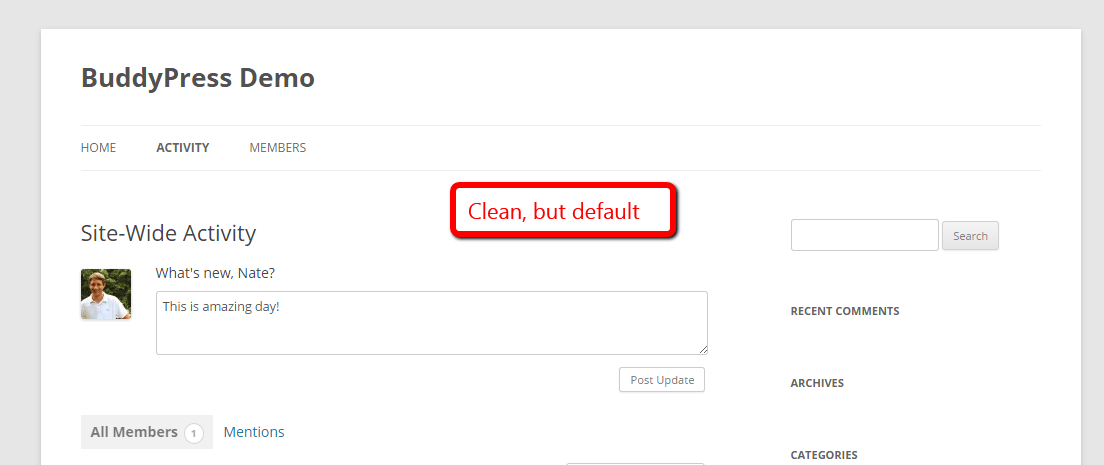
However, default WordPress themes look like, well, the default. They aren’t unique (without heavy customization) and don’t have the beauty or attention to detail that premium themes made by third party professional designers do. Here’s the Default Twenty Twelve Theme with BuddyPress:
When shopping for a premium theme (or theme framework) that you love, you can either look at the BuddyBoss theme OR look for themes that have the ability to add BuddyPress support (ie, adding extra classes, templates, etc).
For example, my favorite theme framework (ie, a theme with a base layout and classes that you can easily add skins, aka “child themes” to) is Genesis by StudioPress. It has a simple plugin that adds BuddyPress support to all themes, so you can install Genesis and select any child theme you like and apply it and it will look consistent across your social network.
There’s also plenty of incredible themes custom built specifically for BuddyPress. You can check out premium themes at ThemeForest here, BuddyPress free themes here, or more premium themes at MOJO Themes here.
Either way, just keep in mind that while your theme should integrate well, BuddyPress does have extra classes and templates that a theme will need to account for.
Additional resources are my breakdown of WordPress theme frameworks, and how to install a WordPress theme here.
Now you officially have a beautiful, functional website just like Facebook!
However, just as sites like Facebook and Twitter are always adding features, BuddyPress allows you to keep adding features and customizing the experience for your members.
Customize & Extend The Social Network Experience
BuddyPress is a WordPress plugin that adds social network functionality to WordPress. But BuddyPress itself can accept plugins as well to add more functionality.
BuddyPress’ free plugins can be found here. Some are interesting, especially for smaller functionality. However the BuddyPress market is not that large, so sometimes free BuddyPress plugins are not kept up to date. I would strongly recommend looking at premium BuddyPress plugins by WPMU to start. They have a great selection and, since they are paid plugins, are well maintained.
BuddyPress also plays well with other WordPress plugins to make all sorts of fun combinations.
bbPress is WordPress’ other sub-project that creates forums. It deserves it’s own setup guide, but keep in mind that adding forums on top of BuddyPress is a very interesting combination.
And since BuddyPress is an open-source platform, developers are straightforward to find. Your imagination is really the only limitation.
Next Steps & Resources
First, you’ll need a domain name for your website. I recommend Namecheap (register for a domain here & read my comparison with GoDaddy here).
Second, you’ll need to sign up for hosting. If you are starting small, check out either Bluehost (see their plans here), InMotion (see their plans here) or HostGator (see their plans here).
If you are going to be more than +100 users right off the bat, then I’d recommend using WP Engine (see their plans here) – a managed hosting service that specializes in WordPress. They may seem pricey, but they have great customer service and will dedicate the resources your site needs. For a growing resource-intensive site, they are worth every penny. They are even investing money in making BuddyPress even better.
Third, you’ll need to install WordPress. See my WordPress website setup guide for step by step walkthrough. If you are using WP Engine, it’s already set up.
Fourth, install BuddyPress plugin & define your components.
Fifth, get a compatible theme. I recommend checking out Themeforest (see here), Genesis theme framework with BuddyPress connect, or customizing a default WordPress theme. See BuddyPress’ free theme directory here.
Sixth, learn WordPress & BuddyPress and explore the options. Start with my intro video guides here.
Seventh, start signing up users, adding content, and growing your website! Good luck!
More Resources:
BuddyPress official documentation